You can attract bluebirds to your yard with a tuna can and a nail. Or with a $10 platform feeder you build in 30 minutes. Or with a $25 entry-tube box that excludes starlings while still serving bluebirds. All three work. The difference is how much time you have, how much you want to spend, and whether starlings are taking over your mealworm offerings.
Most DIY bluebird feeder guides cover one build. This one covers three, in order of effort, so you can pick the right one for your situation. We also cover the welfare math most DIY guides skip (the 50 to 100 mealworm daily cap), the starling problem, and the troubleshooting checklist for when nothing visits after 2 weeks.
If you have not already, our how to attract bluebirds guide covers the broader habitat work (nest boxes, native plants, water) that turns a yard into one bluebirds visit regularly. This article is the DIY feeder companion to that broader piece.
TL;DR
Three builds. Build 1: tuna can + nail = 5 minutes, free, works but attracts starlings. Build 2: clear-side platform with a roof = 30 minutes, $10, partial starling exclusion. Build 3: Andrew Troyer entry-tube box = 1 hour, $25, gold-standard exclusion. Mount any of them at 4 to 6 feet on a fence post or pole, near a nest box if you have one, in open lawn with cover within 20 feet. Fill with live or dried mealworms, 50 to 100 per day cap. Wait 1 to 3 weeks for first visits.
What you need to know before you build
Bluebirds eat insects (mostly mealworms at feeders)
Eastern, Western, and Mountain Bluebirds are primarily insectivores. They catch beetles, caterpillars, spiders, and grasshoppers from the ground in summer and switch to berries (juniper, holly, sumac) in winter when insects are scarce. Our full guide to what bluebirds eat breaks down the diet by season and by species. At backyard feeders, bluebirds will use mealworms, suet mixes, raisins or currants soaked in water, and occasionally bluebird-formulated nuggets. Cornell Lab’s About Suet, Mealworms, and Other Bird Foods covers the broader food options. Mealworms are the universal opener.
The starling and sparrow exclusion problem
Mealworms attract bluebirds. They also attract European Starlings and House Sparrows, both invasive species in North America that often outcompete bluebirds for food and nest cavities. A DIY feeder with no exclusion design will draw all three. The build choice depends on whether your yard has a starling/sparrow problem:
- Build 1 (tuna can): no exclusion. Use only if starlings are absent or you do not mind feeding them too.
- Build 2 (clear-side platform): partial exclusion via tight rim and roof.
- Build 3 (Andrew Troyer entry tube): meaningful starling and sparrow exclusion.
Welfare math: 50 to 100 mealworms per day
Mealworms are low in calcium relative to wild insects. Cap your daily output at 50 to 100 mealworms per feeder during nesting season, and dust mealworms with calcium powder (avian-formulated, from a pet retailer) if you are running a sustained feeder near a nest box. This protects bluebird nestlings from calcium deficiency, which weakens bones and beak development. Sialis.org’s Modified Bluebird Feeder for Mealworms page covers the broader welfare guidance from a bluebird-specialist nonprofit.
Build 1: The tuna can and a nail (5 minutes, free)
This is the build that the search query “how to attract bluebirds with a tuna can and a nail” comes back to. It is exactly as simple as it sounds.
Materials
- 1 clean, empty metal tuna can or cat-food can (label removed)
- 1 galvanized 2-to-3-inch nail (or a roofing nail with a wide head)
- A hammer
- A wooden fence post, deck rail, or sturdy tree branch
- Live or dried mealworms
Step-by-step build
- Wash and dry the can. Soap, water, dry. Remove any sharp edges by flattening them with the hammer.
- Position the can on a wooden fence post at 4 to 6 feet. Eye level for a standing adult is roughly correct. Aim for a section of fence near open lawn with cover (a shrub or low tree) within 20 feet.
- Hammer the nail through the bottom of the can into the fence post. Drive it home until the can sits flat against the wood. If you used a thin nail, bend it over inside the can to lock the can in place.
- Fill the can with mealworms. Start with 50 live or dried mealworms.
Done. Total build time: 5 minutes.
Why this works
Bluebirds are already accustomed to landing on fence posts, deck rails, and other flat horizontal surfaces. A can on a post puts mealworms exactly where a bluebird already wants to be. Audubon’s How to Make a DIY Bird Feeder From Recycled Materials covers similar minimum-viable bird feeder designs; the common thread is that bird feeders do not have to be complicated to work.
Why this fails (and how to fix it)
The tuna can has three failure modes:
- Rust through. Tuna cans last 1 to 2 seasons outdoors before rust eats through. Replace each spring. A cat-food can (slightly heavier gauge) lasts longer.
- Rain pooling. Rain fills the can and drowns dry mealworms. Drill 2 to 3 small drainage holes in the bottom of the can before nailing it on.
- Starlings and sparrows. No exclusion. If starlings are sweeping your mealworms before bluebirds arrive, upgrade to Build 2 or 3.
Build 2: Clear-side platform with a roof (30 minutes, ~$10)
A 6-by-6 platform with low transparent sides and a small peaked roof. Lets bluebirds see and access mealworms while making the feeder uncomfortable for starlings to perch on the rim.
Materials list
- 6 by 6 inch square of 1/4-inch hardware cloth (drainage base)
- 4 lengths of 1x2 lumber, cut to 6 inches each (frame)
- 2 sheets of clear acrylic or plexiglass, 6 by 3 inches each (sides)
- Scrap plywood for a small peaked roof (about 8 by 8 inches)
- Galvanized screws (1.5 inch)
- 1-inch steel mounting pole or wooden post
Step-by-step build
- Frame the hardware cloth. Sandwich the cloth between two 6-inch 1x2 strips on opposite sides; screw together. Repeat for the other two sides. You now have a 6 by 6 platform with mesh bottom for drainage.
- Mount the acrylic side panels. Screw the two 6-by-3-inch acrylic panels to the front and back of the frame, leaving the left and right sides open for bluebird entry.
- Cut and attach a peaked roof. Cut two right triangles from scrap plywood for the gables, then a rectangle for the roof. Nail or screw together. Mount on top of the platform with a small overhang.
- Mount on a pole. Attach the platform to a 1-inch steel pole at 4 to 6 feet using a pipe flange and screws.
Total cost: about $10 if you already have scrap plywood and screws, $15 to $20 buying everything new. Time: 30 to 45 minutes.
Why this design excludes some starlings
Starlings are larger than bluebirds (about 21 cm vs 17 cm). The 6-inch platform with a 6-inch peaked roof gives bluebirds clearance but cramps starlings, especially when multiple starlings try to crowd the platform. The clear sides also reduce the visual openness starlings prefer. This is “partial” exclusion, not complete; persistent starlings will still figure it out. For full exclusion, use Build 3.
Build 3: Andrew Troyer mealworm box (1 hour, ~$25)
This is the gold-standard DIY bluebird feeder. The design originated with bluebird trail volunteers and is documented at Sialis.org’s Modified Bluebird Feeder for Mealworms page. The key feature is a 1.5-inch entry hole that admits bluebirds but excludes most starlings and house sparrows, which are reluctant to enter enclosed spaces for food.
Materials and dimensions
- Wooden box: 6 inches wide x 6 inches deep x 8 inches tall (cedar or pine, untreated)
- 1.5-inch diameter entry hole on each long side, centered at 4 inches from the bottom
- Clear plexiglass top (so you can see worm levels), 6 by 6 inches
- Hinged or removable plexiglass for refilling access
- 1-inch steel mounting pole or sturdy wooden post
Step-by-step build
- Cut the box panels. 2 long sides (8 by 6), 2 short ends (6 by 6), 1 bottom (6 by 6). Drill the 1.5-inch entry hole in each long side, centered, 4 inches from the bottom.
- Assemble the box. Glue and screw all panels except the top. Use exterior-grade screws (galvanized or stainless).
- Add drainage. Drill 3 to 4 small drainage holes (1/8 inch) in the bottom panel.
- Attach the plexiglass top. Use hinges if you want it to flip up for refilling, or use clips for a removable top.
- Mount on a pole at 4 to 6 feet. Use a pipe flange or wooden post bracket.
Why the entry-tube design excludes starlings
European Starlings and House Sparrows have strong aversions to entering enclosed cavities for food (unlike for nesting, where they readily take over bluebird boxes). The 1.5-inch entry hole admits bluebirds easily but starlings and house sparrows usually skip it. Some persistent sparrows still figure it out; in that case, a tighter entry slot (1 by 2.5 inches) restricts them further, though bluebirds find it slightly harder to use.
Sialis.org and other bluebird-specialist welfare organizations document this design as the most effective DIY exclusion method. Audubon’s Four Do-It-Yourself Birdfeeders covers related enclosed-feeder concepts.
Where to place a DIY bluebird feeder
Height: 4 to 6 feet on a fence or post
Lower than 4 feet exposes the feeder to ground predators (cats, raccoons). Higher than 6 feet makes refilling annoying and removes the feeder from the bluebird’s typical hunting altitude. The Cornell Lab Eastern Bluebird overview covers the species’ typical foraging behavior: low perches, short flights to the ground for insects, then back to a perch.
Distance from nest box (15 to 30 feet)
If you have a bluebird nest box, place the feeder 15 to 30 feet away. Close enough that parents can shuttle mealworms to nestlings without long flights, far enough that the feeder does not attract predators directly to the nest.
Open lawn with cover within 20 feet
Bluebirds hunt from low perches in open areas, then return to cover. A feeder in the middle of a forest is wrong; a feeder in the middle of a treeless lawn 100 feet from anything is also wrong. The right placement is open lawn with a single shrub, low tree, or trellis within 20 feet for predator escape and perching. Pair the feeder with a bird bath 15 to 30 feet away to roughly double the species count using your yard.
What to fill it with
Live vs dried mealworms
- Live mealworms: most attractive to bluebirds, especially during early discovery. Store in a refrigerator or cool basement (mealworm beetles develop slowly at 50-60°F so they stay in larval form longer).
- Dried mealworms: cheaper, no refrigeration, slightly less attractive initially. Bluebirds usually accept them within a few days. Soak in warm water for 10 minutes before serving in dry weather to make them more attractive.
- Mealworm mix: 50/50 live and dried in the same feeder is often the highest-attraction option during the transition from live-only to dried.
Calcium dusting for nestlings
During nesting season (May-July in most US regions), dust mealworms lightly with calcium powder (avian-formulated, available at pet supply retailers). This compensates for mealworms’ low calcium content relative to wild insects. Project FeederWatch’s Sick Birds and Bird Diseases covers the broader feeder-welfare context. Our what do fledgling birds eat guide covers the parallel welfare math for found baby birds.
Other foods bluebirds eat
- Raisins or currants, soaked in warm water for 10 minutes
- Suet bits in a tray (no peanuts, which can harm nestlings)
- Bluebird-formulated nugget mixes from backyard-bird retailers
- Halved fresh blueberries, occasionally
Avoid bread (no nutrition, crop impaction risk), peanuts (can harm nestlings), and seed mixes (bluebirds rarely eat seeds).
First 2 weeks: what to expect
Discovery timeline
A new bluebird feeder is typically found within 1 to 3 weeks if a bluebird pair already nests within a few hundred yards of your yard. Yards with existing nest boxes often see use within days because the parent birds are already actively foraging in the immediate area. Yards in good bluebird habitat with no current nest box typically see first visits in 2 to 3 weeks. Yards in marginal habitat (heavy forest, urban) may never see use because no bluebird pair lives close enough.
Troubleshooting (nothing visiting after 2 weeks)
If 2-3 weeks pass with no bluebird visits, check in this order:
- Are bluebirds in your area at all? Cornell Lab’s eBird abundance maps show whether Eastern, Western, or Mountain Bluebirds are present in your zip code at this time of year. No bluebirds in range = no bluebirds at feeder.
- Is the feeder in open habitat near cover? Forest interior, dense suburbia, and treeless prairie all fail. Bluebirds need open lawn with low perches.
- Is the food fresh? Old dried mealworms or rain-soaked worms repel even hungry bluebirds.
- Is the feeder near a nest box? Without a nest box within a few hundred yards, you may be in habitat that bluebirds pass through but do not stop in. Putting up a nest box (separate article: our how to attract bluebirds guide covers nest box specs) often triggers feeder use within a week.
If you have done all four and still no bluebirds, the answer may be that your yard is genuinely not in active bluebird territory this year. Try again next spring when migrants return.
What to skip
Plastic-only containers. Plastic platforms get brittle and crack in UV. Use wood, metal, or acrylic for any panel that needs to last more than one season.
Open mealworm trays with no roof in rainy regions. Mealworms drown or mold quickly when wet. Always include some form of weather protection (roof, dome, or covered design).
Cheap thin nails. A 16-gauge wire nail rusts through within 4 to 6 months outdoors. Galvanized, stainless, or roofing nails last multiple seasons.
Untreated wood in wet climates. Pine box panels rot within 2 years in humid climates. Cedar lasts 5 to 10 years untreated and is worth the small upcharge.
Locating the feeder under a tree. Sap, droppings, and falling leaves foul the food and increase ambush-predator risk.
Mealworm-only diet for nestlings. Cap daily output at 50 to 100 mealworms and let parents catch wild insects too. Calcium dusting during nesting season helps.
Refilling more than once a day in heat. Mealworms left in a 90°F feeder dehydrate within hours. Refill smaller amounts more often, or move the feeder to morning shade.
FAQ
How do you attract bluebirds with a tuna can and a nail? Wash and dry an empty tuna can, then hammer a galvanized nail through the bottom into a wooden fence post 4 to 6 feet off the ground. Fill the can with live or dried mealworms. Bluebirds, especially during nesting season, will find and use the can within 1 to 3 weeks if a pair is already nesting nearby. The design is simple but works because bluebirds are accustomed to landing on fence posts and the open can gives them clear access to mealworms. Refill every 1 to 2 days; cap output at 50 to 100 mealworms per day for welfare reasons.
What is the easiest DIY bluebird feeder to make? A clean metal tuna can nailed to a wooden fence post is the easiest DIY bluebird feeder. It takes 5 minutes, costs nothing, and works. The downsides are that it offers no exclusion (starlings and sparrows will also use it) and that the open can collects rain. Upgrade to a clear-side platform with a small roof for 30 minutes of work and about $10 in materials, or build an Andrew Troyer-style entry-tube box for genuine starling exclusion.
Can bluebirds eat dried mealworms? Yes. Dried mealworms are widely accepted by bluebirds, slightly less attractive than live mealworms but easier to store and dispense. Some bluebirds initially ignore dried mealworms when only live ones have been offered before; the transition usually takes a few days. To make dried mealworms more attractive, soak them in warm water for 10 minutes before offering, especially in dry weather. Mix live and dried mealworms in the same feeder to bridge the transition.
How do I keep starlings off my mealworm feeder? Three approaches work. First, use an enclosed feeder with a small entry hole (about 1.5 inches) that admits bluebirds but excludes larger starlings. Second, run a clear-side platform with a roof low enough that starlings cannot fit comfortably. Third, offer mealworms only at specific times of day and immediately remove uneaten worms once bluebirds finish; starlings sweep feeders less often than bluebirds make repeat visits. The Andrew Troyer entry-tube design is the most reliable exclusion strategy for a DIY feeder.
Where should I place a homemade bluebird feeder? Mount your DIY bluebird feeder 4 to 6 feet off the ground on a wooden fence post, deck rail, or metal pole. Place it 15 to 30 feet from any bluebird nest box you have so parents can shuttle mealworms to nestlings. The feeder should sit in open lawn with cover (a shrub or low tree) within 20 feet for predator escape, but not directly under a tree where droppings will foul the food. Keep cats indoors and treat large nearby windows with decals to reduce mortality at the feeder.
How many mealworms should I put out per day? Start with 50 mealworms per day and cap at 100 per day, especially during nesting season. Mealworm-only diets can deplete calcium reserves in nestlings, so mealworms should supplement, not replace, the wild insects parent bluebirds catch. Refresh the feeder daily; mealworms left in heat will dry out or attract ants and starlings. A standard 1.1 pound bag of dried mealworms contains roughly 8,000 to 10,000 worms, lasting 80 to 200 feeder-days at 50 to 100 per day.
What to do this week
If you want to try the simplest path:
- Find a clean tuna can in your recycling.
- Find a galvanized nail in your tool drawer.
- Pick a section of fence post 4 to 6 feet up near open lawn with cover.
- Hammer the can to the post, fill with mealworms, leave it alone for 3 weeks.
If starlings are taking over: build the Andrew Troyer entry-tube box this weekend. The 1-hour build effort pays back across years.
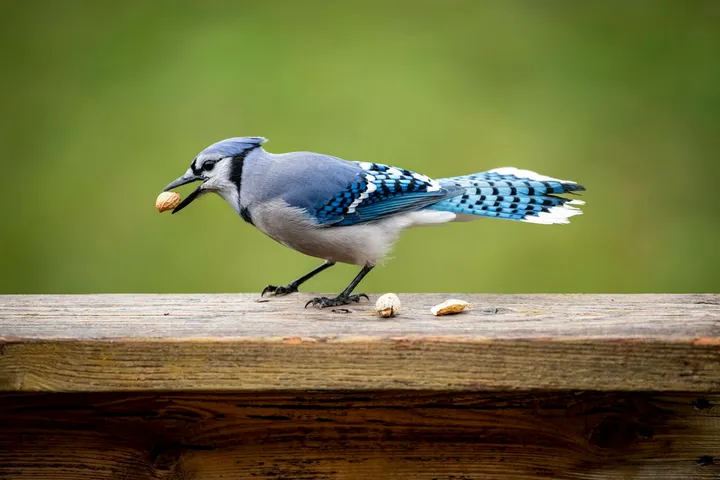
Either way, our how to attract bluebirds guide covers the broader habitat work (nest boxes, native plants, House Sparrow exclusion) that turns a yard from “occasional bluebird visit” into a regular nesting territory. Our keep squirrels out of bird feeders article covers the related exclusion-by-design math, and the bird feeder for blue jays guide covers the same concept applied to a different competitor species. For the broader pillar on which feeder serves which species, see our how to attract birds to a bird feeder article. The DIY bluebird feeder is the cheapest entry to the bluebird side of backyard birding.